




Miter Cuts Dont Match the Wall Angle How a Protractor Solves It (2026)
Disclosure: AltitudeCraft is a manufacturer of precision measurement tools. This article contains product recommendations based on our engineering expertise. Last updated April 2026.


The tool for this job
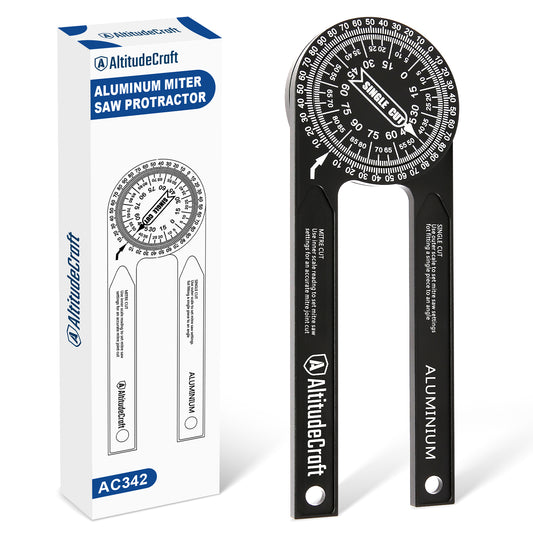
AltitudeCraft Precision Aluminum Miter Saw Protractor
$20.99
Free shipping & free returns on US orders $25+
View productWhy Do Your Miter Cuts Keep Gapping? (Hint: It Is Not the Saw)
Miter joint gaps are caused by incorrect angle settings 95% of the time — most walls meet at 87-93 degrees rather than exactly 90, but carpenters cut at the default 45° assuming the corner is perfect.
You measured twice, cut once, and the joint still has a gap. Before you blame your saw or your blade, consider this: the most common cause of misfit miter joints is the assumption that every wall corner is exactly 90 degrees.
In reality, residential construction tolerances allow walls to sit anywhere from 87° to 93°. Older homes with plaster walls can deviate even further. When you set your miter saw to the "standard" 45° and the actual corner is 88°, each side of the joint is off by 1°—creating a combined 2° gap that is impossible to caulk invisibly.
This is not a skill issue. It is a measurement issue. And the fix is remarkably simple: measure the actual angle before you cut.
Ready to upgrade your toolbox?
See the Miter Saw ProtractorWhat Are the Three Root Causes of Gapping Miter Joints?
The three root causes of gapping miters are: out-of-square walls (87-93° instead of 90°), saw calibration drift (the 45° detent stop shifts 0.5-1° over time), and material movement from humidity changes after cutting.
Understanding why gaps appear helps you diagnose them faster. Every gap traces back to one of three causes, and sometimes a combination of all three.
1. Wall Angle Deviation
This is the number-one culprit. Drywall, framing inconsistencies, and settling all contribute to corners that are not square. Even in new construction, corners routinely measure 89° or 91°. A precision miter saw protractor reveals the true angle in seconds, eliminating the guesswork that leads to wasted material and frustration.
2. Using the Default 45° Without Verification
Most woodworkers learn to cut 45° miters for inside corners and assume that setting will work everywhere. This shortcut works only when the corner is exactly 90°. When it is not—and it usually is not—you need to divide the measured angle by two and set your saw accordingly. For an 88° corner, that means setting the saw to 44°, not 45°.
3. Saw Calibration Drift
Miter saws lose calibration over time. The detent at 45° can drift by 0.5° or more after heavy use. Even if you have a true 90° corner, a saw that is slightly off will produce a gap. Regular calibration checks with a known-accurate protractor catch this before it costs you a piece of crown molding.
How Do You Diagnose the Gap Pattern to Find the Cause?
An open-top gap means your miter angle is too shallow (wall is less than 90°), an open-bottom gap means too steep (wall is more than 90°), and a uniform gap across the entire joint means the pieces are the wrong length, not the wrong angle.
Not all gaps look the same. The pattern of the gap tells you exactly what went wrong. Use this table to diagnose your most recent misfit joint:
| Gap Pattern | Location | Most Likely Cause | Fix |
|---|---|---|---|
| Open at the front, tight at the back | Inside corner | Corner angle is greater than 90° (obtuse) | Decrease miter angle (e.g., 44° instead of 45°) |
| Tight at the front, open at the back | Inside corner | Corner angle is less than 90° (acute) | Increase miter angle (e.g., 46° instead of 45°) |
| Open at the top, tight at the bottom | Crown molding | Spring angle not accounted for, or wall not plumb | Measure wall angle AND verify plumb before cutting |
| Uniform gap across entire joint | Any joint | Saw calibration drift or blade deflection | Recalibrate saw with a known-accurate protractor |
| Gap appears after installation | Any joint | Wood movement due to moisture or nail placement stress | Acclimate material, use proper fastening technique |
| Inconsistent gaps across multiple joints | Entire room | Different wall angles at each corner | Measure every corner individually with a protractor |
How Does a Miter Saw Protractor Solve the Gap Problem?
A protractor placed directly in the wall corner reads the exact angle to half-degree precision, then you divide by two to get the correct miter saw setting — eliminating the guesswork that causes gaps on the first cut.
A miter saw protractor is a purpose-built angle-finding tool. Unlike a combination square or a digital angle finder designed for flat surfaces, a quality miter protractor is engineered specifically for reading wall corners and translating that reading directly to your saw setting.
Here is the process that eliminates guesswork entirely:
- Place the protractor in the corner. Press both arms firmly against the adjacent walls. The reading on the protractor shows the actual corner angle.
- Divide the angle by two. This gives you the miter saw setting. For a 92° corner, set the saw to 46°.
- Set your saw and cut. No test cuts needed. The joint will close tight on the first attempt.
The AltitudeCraft Precision Aluminum Miter Saw Protractor features laser-engraved graduations on aircraft-grade aluminum, which means the markings will not wear off and the tool will not flex under pressure. The large, clear scale makes it easy to read precise angles even in dim work conditions.
When Does the Default 45° Miter Setting Fail?
The default 45° fails in every older home (pre-1980 construction routinely has 85-95° corners), at three-way intersections, on walls with thick drywall buildup, and anywhere settlement or framing errors have shifted the original geometry.
To illustrate how common this problem is, consider these everyday situations where a protractor saves time and material:
Baseboard in Older Homes
Older homes with plaster walls are notorious for out-of-square corners. We have measured corners as far off as 85° in pre-war homes. Without a protractor, you would need three or four test cuts per corner, wasting expensive baseboard material each time. Multiply that across a 12-corner room and the waste adds up fast.
Crown Molding on Uneven Ceilings
Crown molding compounds the problem because it sits at a spring angle between the wall and ceiling. If the wall corner deviates from 90° and the ceiling is not level, you are dealing with two variables simultaneously. Measuring the actual wall angle with a protractor eliminates one variable immediately, making the compound cut calculation manageable. For detailed troubleshooting techniques on trim work, This Old House's trim guide provides additional context on coping as an alternative to mitering in difficult corners.
Kitchen Cabinet Trim
Cabinet trim work demands tight joints because the viewing distance is close and the lighting is bright. A 1° error that might be acceptable on baseboard becomes glaringly obvious on kitchen crown. Measuring each corner individually with a protractor is the only reliable approach for cabinet-level fit quality.
What Mistakes Do Even Experienced Carpenters Make?
The three most common expert mistakes are: trusting their eye to judge half a degree (the eye cannot detect angles below 2°), using the saw's built-in angle scale as gospel (calibration drifts after 100+ cuts), and cutting both pieces at the same angle for inside vs outside corners (they require opposite directions).
Experience can actually work against you when it comes to miter accuracy. Here are the mistakes we see most often:
- Trusting the 45° detent on the saw. Detents wear. Check your saw's 45° stop against a known-accurate reference at least monthly.
- Measuring one corner and assuming the rest match. Every corner in a room can be a different angle. Measure each one.
- Rounding the angle reading. If the protractor reads 91.5°, set the saw to 45.75°. Do not round to 46°. Half-degree precision matters on tight joints.
- Not accounting for material thickness. On thick trim (5/4 stock or thicker), even a tiny angular error is amplified across the wider face of the joint.
The construction industry widely recognizes that accurate angle measurement is foundational to quality finish work. The Journal of Light Construction's miter fitting guide documents the same principle: measure first, cut once, and eliminate the trial-and-error approach that wastes time and material.
How Does a Protractor Compare to Other Angle-Finding Methods?
A dedicated miter saw protractor reads corner angles in 5 seconds with zero calculation, while a digital angle finder requires battery power and costs 2-3x more, a T-bevel requires separate angle transfer, and a speed square cannot measure inside corners directly.
You might wonder whether a dedicated miter protractor is necessary when other tools exist. Here is how the options compare:
- Speed square: Designed for 90° and 45° references only. Cannot read arbitrary wall angles.
- Digital angle finder: Works on flat surfaces but often too short to span a wall corner accurately. Battery-dependent.
- Bevel gauge: Captures an angle but does not give you a number to set your saw to. Requires transferring the angle to a protractor anyway.
- Miter saw protractor: Purpose-built to read wall corners and give you the exact saw setting. No batteries, no transfer step, no ambiguity.
For trim carpenters and serious DIYers, a dedicated miter protractor is the most efficient path from wall angle to saw setting. Browse the full range of AltitudeCraft precision measurement tools to find the right fit for your workshop.
How Do You Eliminate Miter Gaps Step by Step?
Follow this workflow on your next trim installation and you will not go back to guessing:
- Walk the room. Place your protractor in every corner and record the angle on a sketch of the room layout.
- Calculate saw settings. Divide each corner angle by two. Write the saw setting next to each corner on your sketch.
- Verify saw calibration. Before cutting, check your saw's 45° detent against the protractor. Adjust if needed.
- Cut and dry-fit. Cut one joint and test-fit before committing to the installation. The joint should close perfectly.
- Install with confidence. Once verified, proceed through the room corner by corner using your pre-calculated settings.
This five-step method typically takes less than 10 minutes of additional setup time per room and eliminates the 30-60 minutes of rework that guessing creates. Read more practical tips on our AltitudeCraft blog for detailed installation guides and measurement techniques.
For a complete step-by-step guide to measuring and transferring angles, see our angle transfer tutorial. For stair trim and non-90° corners that require advanced techniques, see our stair trim guide. For a comparison of analog protractors vs digital angle finders, see our protractor vs Wixey comparison.
Frequently Asked Questions
Why do my 45-degree miter cuts not line up?
The most common reason is that your wall corner is not exactly 90 degrees. Even a 1-degree deviation means your 45-degree cut is wrong for that corner. Use a miter saw protractor to measure the actual angle, divide by two, and set your saw to the precise number. This single step eliminates the majority of miter joint gaps in residential trim work.
How accurate does a miter protractor need to be?
For finish trim work, you need accuracy to at least 0.5 degrees. A 1-degree error on each side of a joint creates a 2-degree combined gap, which is visible on any trim wider than 2 inches. The AltitudeCraft protractor provides laser-engraved graduations for consistent precision across the full range of measurement.
Can I use a digital angle finder instead of a miter protractor?
You can, but digital angle finders have drawbacks for corner measurement: they are typically too short to span a full corner accurately, they require batteries, and they must be zeroed before each use. A dedicated miter protractor is purpose-built for wall corners and gives you the saw setting directly without conversion.
How often should I calibrate my miter saw?
Check your saw's 45-degree and 90-degree detent stops at least once a month if you use the saw daily, or at the start of every trim project. Place your protractor against the blade and fence to verify the angle matches the scale reading. Adjust the detent if it has drifted.
What if my corner is more than 3 degrees off from 90?
Corners that deviate more than 3 degrees from 90 are uncommon but not rare, especially in older homes or additions. The protractor handles any angle within its measurement range. For extreme angles (below 80° or above 100°), you may also need to consider coping the joint rather than mitering it, as very acute or obtuse miters create fragile feather edges on the trim.
Does the protractor work for outside corners too?
Yes. The measurement process is identical. Place the protractor against both walls, read the outside corner angle, divide by two, and set your saw. Outside corners in most homes tend to be closer to 90° than inside corners, but measuring first is still the safest approach. Explore more precision tools for finish carpentry to outfit your full toolkit.
Stop Guessing. Start Measuring.
The AltitudeCraft Precision Aluminum Miter Saw Protractor eliminates gap-producing guesswork from every miter joint. Aircraft-grade aluminum, laser-engraved markings, and a design built specifically for reading wall corners.
Upgrade Your Workflow with AltitudeCraft
Engineering-grade tools built for professionals and serious DIYers. Free shipping on all orders.
Shop Miter Saw ProtractorFeatured in this guide
AltitudeCraft Precision Aluminum Miter Saw Protractor
$20.99
Free shipping & free returns on US orders $25+
View productRelated Articles
 Lock-N-Load Bushing Won't Lock? Diagnose Spin, Slop, and Fitment (2026)
Aug 09, 2026
Lock-N-Load Bushing Won't Lock? Diagnose Spin, Slop, and Fitment (2026)
Aug 09, 2026
 Strut Spreader Tool Complete Guide: DIY Suspension Work Made Easy (2026)
Apr 02, 2026
Strut Spreader Tool Complete Guide: DIY Suspension Work Made Easy (2026)
Apr 02, 2026
 Thread Checker Complete Guide: Identify Any Bolt Size in Seconds (2026)
Apr 02, 2026
Thread Checker Complete Guide: Identify Any Bolt Size in Seconds (2026)
Apr 02, 2026
 Sight Pusher Tool Complete Guide: How to Install Glock Sights Like a Pro (2026)
Apr 02, 2026
Sight Pusher Tool Complete Guide: How to Install Glock Sights Like a Pro (2026)
Apr 02, 2026
