


Key Points:
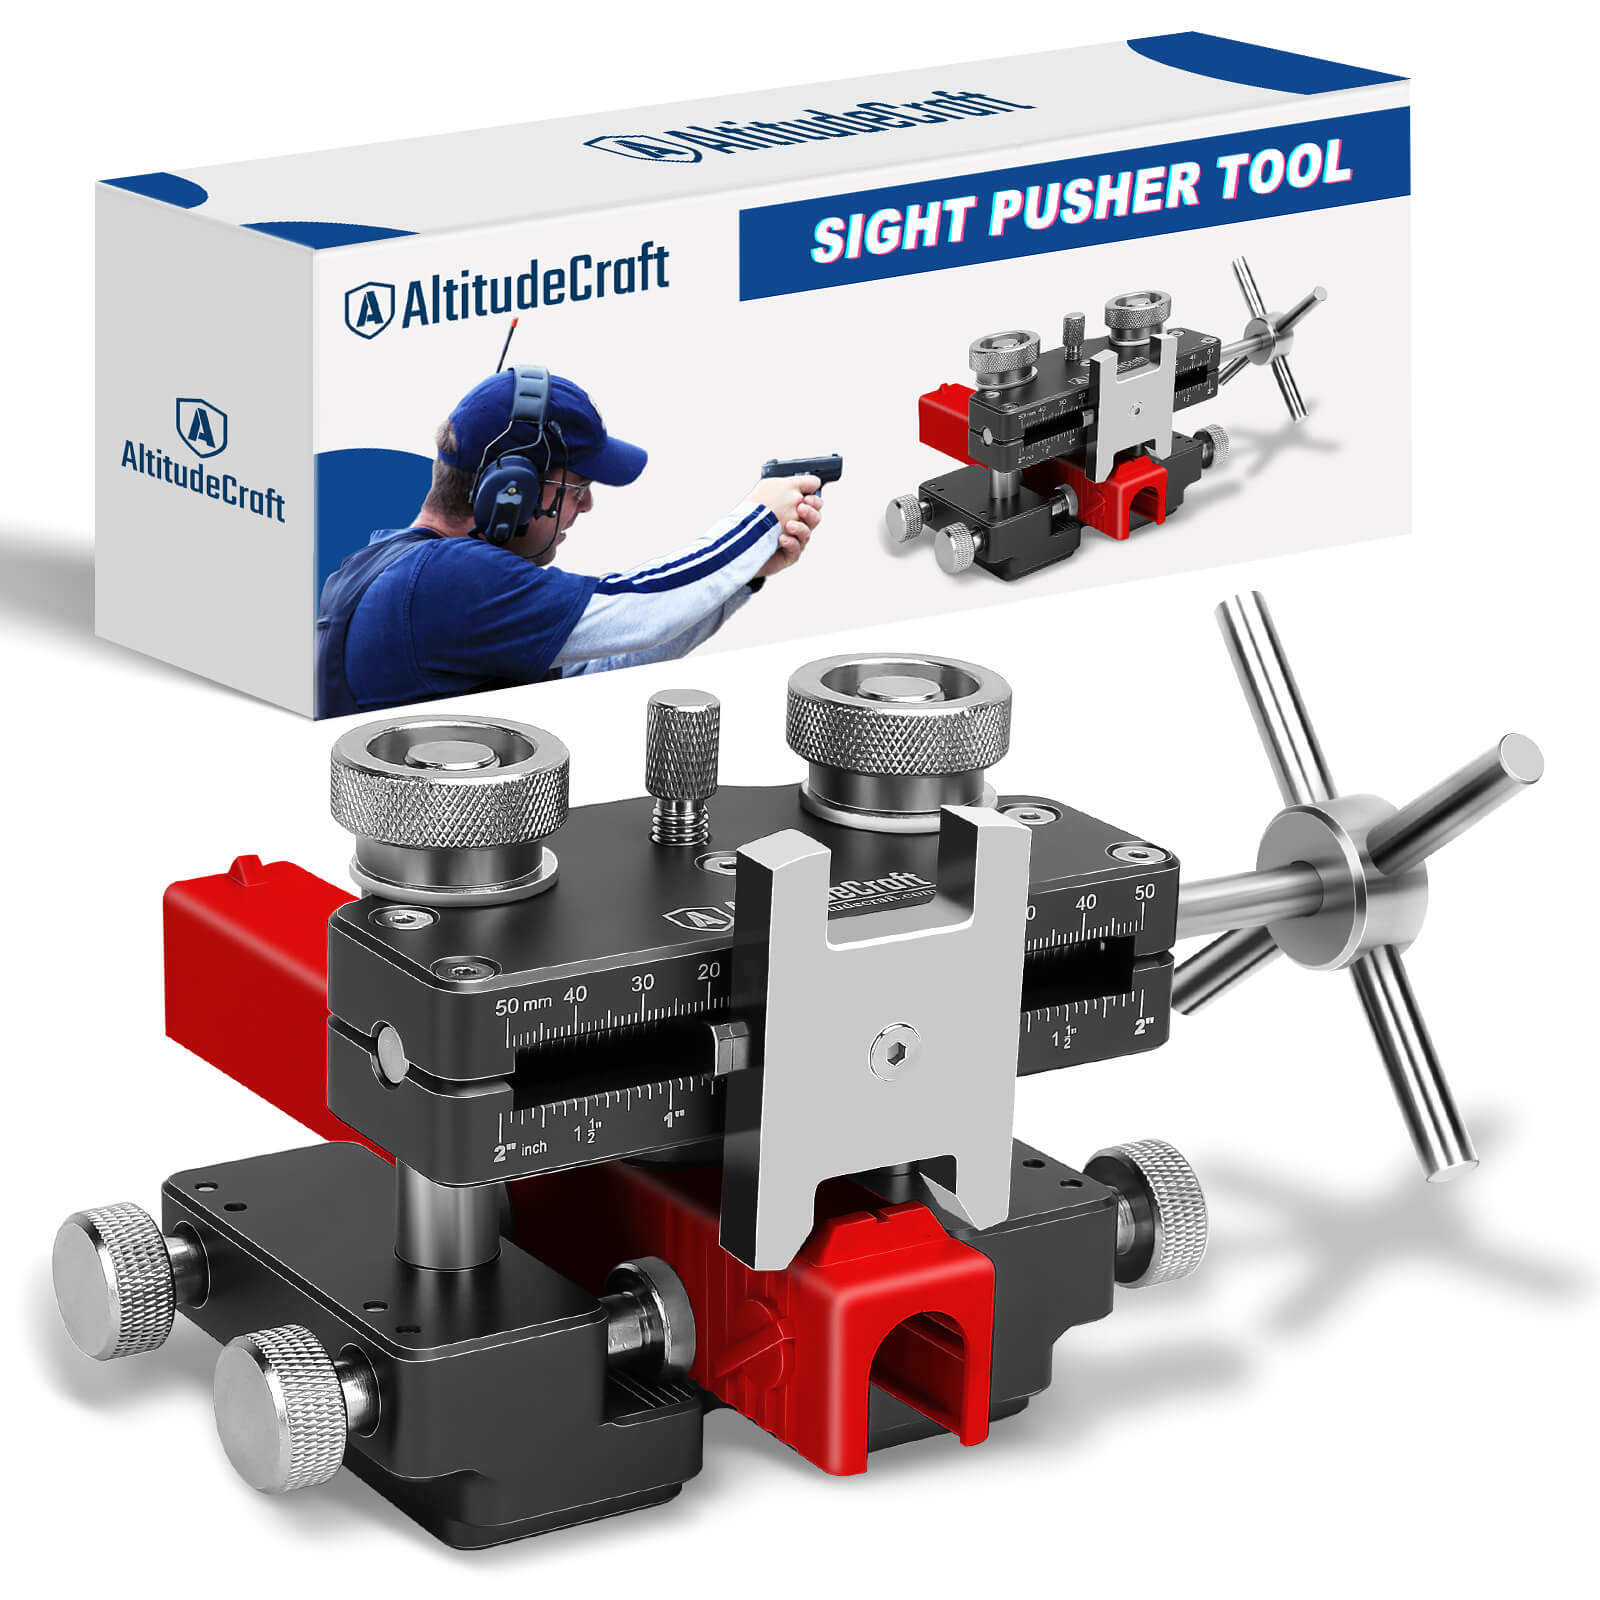
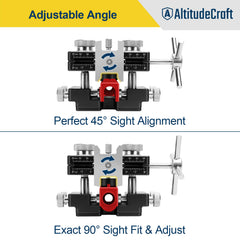
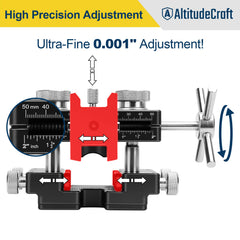
- Precision Adjustments: Equipped with accurate reference marks, this sight pusher tool ensures millimeter-level adjustments for front and rear sights. Designed for firearms enthusiasts, it guarantees precise alignment every time, meeting the most stringent gunsmithing standards.
- Ease of Use Design: Engineered with advanced machining technology, featuring a large 4-post drive knob for effortless sight manipulation. Suitable for installing, uninstalling, or adjusting front and rear dovetail sights on all semi-automatic pistols, offering unparalleled ease of use.
- Universal Compatibility: This sight pusher tool is compatible with all semi-auto pistol models, including a reversible sight prong for Glock slides. Whether it’s traditional or modern firearms, this tool adeptly handles all types.
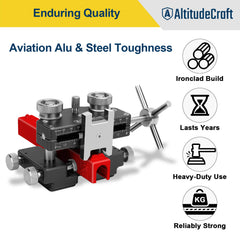
- Reliability and Durability: Constructed with a sturdy aluminum frame and steel components, ensuring long-term durability. Fully secures and supports the slide to prevent breakage or deformation during adjustments, providing a solid foundation for gunsmithing tasks.
- Versatile Application: Ideal for personal firearms maintenance, professional gun shop services, or security agency weapon upkeep. Especially suitable for shooters and competitors in need of precise firearm adjustments, as well as educational institutions teaching gun maintenance.


Frequently Asked Questions:
How easily can this tool adjust sights on popular firearms like Glocks and 1911s?
Effortlessly! Our tool is specially designed for easy adjustments on popular models including Glocks and 1911s.
Is there a risk of damaging my gun while using this tool?
Safety first! Our tool is engineered to be gentle on your firearm, minimizing any risk of damage.
Can this tool handle the toughest sight adjustments?
Absolutely. It's built for strength and precision, capable of handling even the most stubborn sights.
What makes this sight pusher stand out from others in the market?
Our tool combines versatility, durability, and precision, offering a superior experience compared to other options.
Will using this tool require any prior gunsmithing knowledge?
Not at all. It's user-friendly for both beginners and professionals, with a straightforward manual to guide you.
