




16 vs 24 Stud Spacing: When 24 On Center Is Allowed (and When It Isn't)
Last updated: October 2026 | By AltitudeCraft Team
16 vs 24 stud spacing comes down to what the wall carries. Under the International Residential Code, a 2x4 bearing wall can be framed 24 inches on center only when it holds up a roof and ceiling and nothing else. Once a floor sits above it, 2x4 studs have to drop to 16 inches. A 2x6 wall can stay at 24 inches while carrying one floor plus the roof. Non-bearing partitions can be 24 inches on center in either size. Everything else is a trade-off. At 24 inches you use about a third fewer studs and get more room for insulation. At 16 inches you get stiffer drywall, firmer walls, and more places to anchor shelves and TV mounts.
Disclosure: AltitudeCraft makes a 16-inch and a 24-inch stud layout jig. You don't need either to choose a spacing, and we explain below where each one is the wrong tool.
Key Takeaway
Use 24-inch on center for non-bearing interior partitions, for 2x4 bearing walls that carry only a roof and ceiling, and for 2x6 exterior walls under one floor and a roof. Pairing 24-inch spacing with 2x6 exterior walls is the core of the "advanced framing" approach the U.S. Department of Energy promotes for energy savings. Use 16-inch on center when a 2x4 wall carries a floor above, when you use utility-grade studs, when your jurisdiction caps spacing for wind, or when you want the flattest drywall and the most backing for cabinets and mounts. Over a 40-foot wall, 24-inch spacing needs 21 layout studs and 16-inch spacing needs 31, so you save 10 studs before corners and openings. The 24-inch layout only pays off if roof trusses, studs and floor joists all land on the same 2-foot grid. Check your local code before you commit, because adopted editions and wind zones change the answer.


The tool for this job
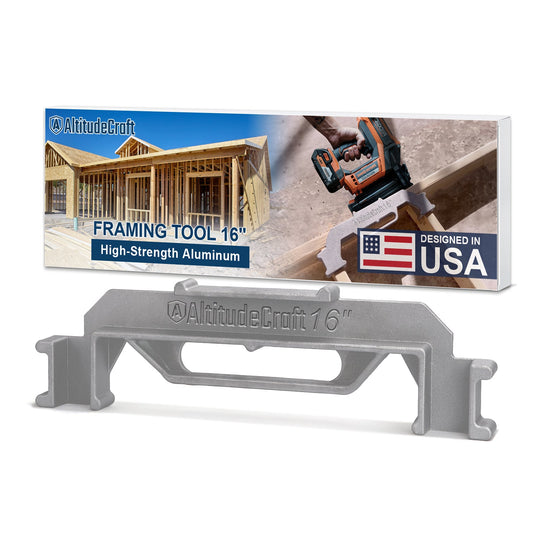
AltitudeCraft 16 Inch Precision Framing Stud Layout Tool
From $42.99
Free shipping & free returns on US orders $25+
View productWhat does 24 on center mean, and how does it differ from 16?
"On center" (OC) means the distance from the centerline of one stud to the centerline of the next. With 1-1/2-inch-thick studs, a 16-inch OC wall leaves a 14-1/2-inch clear bay between studs, and a 24-inch OC wall leaves 22-1/2 inches. Those clear widths are why fiberglass batts come in 15-inch and 23-inch widths. Each batt is a little wider than the bay so it friction-fits.
Both numbers divide evenly into 48 inches. That matters because plywood, OSB and drywall come in 4 x 8 sheets, and every sheet edge has to land on the middle of a stud. With 16-inch spacing a 48-inch sheet breaks on every third stud. With 24-inch spacing it breaks on every second stud. Any other spacing, like 19.2 inches, works for sheets too, but it is mostly used for floor joists, not walls.
In our return notes, the most common spacing mistake isn't about code at all. It's buying the wrong size. Customers who sent back our 12-inch jig wrote things like "meant to buy the 16 one not 12" and "Really need the 16 on center tool and thats the only reason for the return." For our 16- and 24-inch jigs, we logged 45 Amazon returns between August 1 and October 24, 2026. Twenty-two were buyers who no longer wanted the tool, 12 were "not as described," three were marked defective, three used size or fit codes (too large, too small, not compatible), and five were delivery or price returns. Most recent returns carry no written comment, so we can't say how many were spacing mix-ups. The written ones above show the pattern, though: buyers who hadn't settled on a spacing before they ordered. Decide the spacing first, from the rules below, and then buy tools.
Can 2x4 load bearing walls be 24 on center? The IRC stud table
The governing rule is IRC Table R602.3(5), "Size, Height and Spacing of Wood Studs." The 2021 edition's values are reproduced below from the California Residential Code, which adopts the same table (CRC Table R602.3(5)). Heights are the distance between points of lateral support, which in practice means floor-to-ceiling for a typical wall. You can read the official chapter on the ICC's 2021 IRC Chapter 6.
| Stud size | Bearing wall: max height | Roof + ceiling only | One floor + roof + ceiling | Two floors + roof + ceiling | Non-bearing: max height / spacing |
|---|---|---|---|---|---|
| 2x3 | Not allowed | — | — | — | 10 ft / 16 in. |
| 2x4 | 10 ft | 24 in. | 16 in. | Not allowed | 14 ft / 24 in. |
| 3x4 | 10 ft | 24 in. | 24 in. | 16 in. | 14 ft / 24 in. |
| 2x6 | 10 ft | 24 in. | 24 in. | 16 in. | 20 ft / 24 in. |
Three footnotes change real projects:
- Utility-grade studs are capped at 16 inches on center, can carry only a roof and ceiling, and are limited to 8 feet in exterior or bearing walls.
- 2x3 studs can't be used in exterior walls at all.
- A habitable attic over 2x4 studs limits the roof span to 32 feet. Longer spans need 2x6 studs or an engineered design.
Wind can override the table. In a Green Building Advisor discussion of a 10-foot 2x4 wall at 24 inches in a 115 mph wind zone, the posters concluded the wind-based stud table may limit spacing to 16 inches or less (GBA). The Department of Energy's Building America Solution Center also notes that in some jurisdictions, particularly hurricane zones, 16 inches on center is the maximum allowed (BASC, PNNL). Ask your building department before you lay out a single plate.

16 vs 24 on center: side-by-side comparison
| Factor | 16 in. on center | 24 in. on center |
|---|---|---|
| Studs per 8 ft of wall (layout only) | 7 | 5 |
| Studs per 40 ft of wall (layout only) | 31 | 21 |
| Clear bay width (1-1/2 in. studs) | 14-1/2 in. | 22-1/2 in. |
| Batt width | 15 in. | 23 in. |
| 2x4 bearing wall with a floor above | Allowed | Not allowed |
| 1/2 in. drywall on ceilings | Either direction | Perpendicular to framing only |
| Wall stiffness and feel | Firmer, flatter drywall | More flex, can sound hollow |
| Backing for shelves, cabinets, TV mounts | More studs to hit | Often needs added blocking |
| Whole-wall R-value (DOE example) | R-9.4 (2x4 + R-13) | R-15.2 (2x6 + R-19) |
Stud counts use the layout formula: wall length in inches ÷ spacing, plus one. A 96-inch wall at 16 inches is 96 ÷ 16 + 1 = 7 studs. At 24 inches it's 96 ÷ 24 + 1 = 5 studs. Corners, wall intersections, and the king and jack studs around openings are extra in both layouts. The R-values are DOE's whole-wall figures for a 2x4 wall at 16 inches against a 2x6 wall at 24 inches, so they mix two changes: deeper studs and wider spacing (BASC).
Why build 2x6 walls 24 on center? Advanced framing
Wider spacing is the core of what DOE calls advanced framing, or optimum value engineering. DOE's Building America guide puts it plainly: "Specify 24-inch on-center for 2x6 wall framing rather than 16-inch on-center 2x4 wall framing." It says this reduces the number of wall studs by one-third, which matches our layout math of 21 vs 31 studs on a 40-foot wall (BASC). The guide gives these numbers:
- On a 2,910 sq ft house, the switch saved 1,634 board feet of lumber and $171. With other advanced framing steps added, lumber costs fell by $1,117.
- Whole-wall R-value rose from R-9.4 (72% of the rated R-13) to R-15.2 (80% of the rated R-19), because fewer studs means less wood bridging the insulation.
- The wall change alone produced 11% energy savings.
The catch is alignment. Advanced framing uses single top plates, so every roof truss and floor joist has to sit directly over a stud. That requires designing the whole house on a 2-foot grid. Windows and doors should land on that grid too, or you add back the king studs you saved. If trusses arrive at 24 inches but the wall layout starts from the wrong end, the single-plate system stops working.
Note what the energy argument is really about: it's mostly about 2x6 walls. One building scientist in a Green Building Advisor thread estimated that going from 16 to 24 inches by itself adds only about 4% to a wall's R-value, and less once continuous exterior insulation is added (GBA).

Drywall on 24 inch centers: what the code allows
IRC Table R702.3.5 allows 1/2-inch gypsum board on ceilings at 24 inches only when the board runs perpendicular to the framing. Run it in either direction and the limit is 16 inches. If you'll spray a water-based texture, 24-inch framing needs 5/8-inch board or 1/2-inch sag-resistant ceiling board, as local fastening handouts summarize (City of Richland, WA). Even when it's legal, standard half-inch board can droop. A Journal of Light Construction Q&A notes that manufacturers approve 1/2-inch board on 24-inch ceiling framing, but the answer warns that it can sag there and recommends 5/8-inch board or 1x3 strapping at 16 inches (JLC).
What are the other downsides of 24 inch on center?
Walls feel and sound different
Owners in a GarageJournal thread described slight bowing in drywall between studs on 24-inch walls, and a neighbor's 24-inch wall that shook when doors slammed (GarageJournal). These are individual reports, not measurements, but they match a simple fact: a 22-1/2-inch drywall span flexes more than a 14-1/2-inch one.
Fewer studs to hang things on
Upper cabinets, grab bars, floating shelves and TV mounts are easiest with a stud every 16 inches. At 24-inch spacing, plan 2x blocking between studs at mounting heights before the drywall goes up. The same goes for exterior cladding. Check your siding manufacturer's fastening schedule, because some products need fasteners into framing at a set spacing.
Which should you use? Decision guide by wall type
| Wall | Recommended spacing | Why |
|---|---|---|
| Interior non-bearing partition, 2x4 | 24 in. (16 in. if you want firmer walls or heavy wall-hung items) | Code allows 24 in. up to 14 ft |
| Single-story exterior wall, 2x4, roof and ceiling only | 24 in. allowed; 16 in. is common | Allowed up to 10 ft unless wind tables or local code say otherwise |
| First-floor wall under a second story, 2x4 | 16 in. | 2x4 at 24 in. isn't permitted with a floor above |
| Exterior wall, 2x6, advanced framing | 24 in., aligned with trusses and joists | Allowed under one floor and roof; DOE energy benefit |
| Garage, shed or shop wall | 16 in. if you'll hang tools and cabinets; 24 in. if not | Backing matters more than lumber cost |
| Bathroom or kitchen walls | 16 in. | Tile backer, cabinets and grab bars want closer support |
| Utility-grade studs | 16 in. max | Code cap regardless of load |
How to lay out a wall at 24 inches on center
- Start from the same end as the trusses or joists. On an advanced-framed house, use the same starting point the truss layout uses, so every truss lands over a stud.
- Pull your tape from the end of the plate and mark 23-1/4 inches. That's the edge of the first layout stud. It puts the stud's center at 24 inches, so the first sheet edge lands on the center of the stud. For 16-inch walls the same mark is 15-1/4 inches, as explained in our guide to 16-inch on-center stud layout.
- Mark every 24 inches from there by hooking the tape at the plate end, not by measuring stud to stud. Measuring from each previous mark adds up small errors.
- Put an X on the side of the line where the stud goes, and mark openings, king studs and blocking heights before you cut anything.
- Check every 4-foot sheet break with the tape before nailing sheathing. If the sheet edge doesn't land on the center of a stud, fix the layout now.

Tape, story pole, or layout jig: which tool fits which wall?
A tape measure and pencil handle any spacing and any lumber size. A story pole, which is a straight board with the layout marked once, is the fastest way to copy the same layout onto top and bottom plates. A layout jig is fastest when you build walls flat on the deck and stand them up, because it holds each stud while you nail it.
Know the limits before buying one. Our 24-inch framing jig and 16-inch stud layout tool are made for 2x4 walls. Our returns include the note "Doesnt work with 2x6", so for 2x6 advanced framing use a tape or story pole. The jigs also only work while the wall is flat. They don't help you find studs in a wall that's already standing. Every slip-on jig has some play around the stud, which we explain in why every framing jig has play.

What mistakes do people make with 16 vs 24 stud spacing?
- Framing a first-floor 2x4 wall at 24 inches under a second story. The IRC doesn't allow it. Use 16 inches or switch to 2x6.
- Using 24-inch walls with 16-inch trusses or joists. With single top plates, loads must stack. Mixed grids need double top plates or headers, which wipes out the savings.
- Hanging 1/2-inch drywall parallel to 24-inch ceiling framing. It isn't allowed and it will sag. Run it perpendicular, or use 5/8-inch or sag-resistant board.
- Forgetting blocking. At 24 inches, add backing for cabinets, rails and mounts before drywall, not after.
- Mixing up "on center" and clear space. 16 inches OC leaves a 14-1/2-inch gap between studs, not 16. If your gap measures 16 inches, your spacing is 17-1/2 inches. Our guide to fixing studs that don't line up covers how to recover.
Frequently Asked Questions About 16 vs 24 Stud Spacing
Is 24 inch stud spacing up to code?
Yes, in many cases. The IRC allows 2x4 studs at 24 inches in non-bearing walls and in bearing walls that carry only a roof and ceiling. It allows 2x6 at 24 inches under one floor and a roof. Wind zones and local amendments can lower the limit to 16 inches.
Can a load-bearing wall be 24 inches on center?
Yes, if the studs are big enough for the load. A 2x4 bearing wall can be 24 inches only under a roof and ceiling. A 2x6 bearing wall can be 24 inches under one floor plus a roof. Two floors above requires 16 inches.
Are interior walls 16 or 24 on center?
Most houses frame interior walls at 16 inches out of habit, but non-bearing 2x4 partitions can be 24 inches up to 14 feet tall. Choose 16 inches where you'll hang cabinets or heavy items.
Is 24 on center strong enough for drywall?
On ceilings, 1/2-inch board at 24 inches is allowed only when it runs perpendicular to the framing, and you need 5/8-inch or sag-resistant board if you'll spray texture. On walls, expect more flex between studs than at 16 inches. If a flat finish matters, use 5/8-inch board or frame at 16 inches.
How do I know if my existing walls are 16 or 24 on center?
Find two neighboring studs with a stud finder or by looking at drywall screw lines, then measure center to center. Check a few bays away from doors and windows, because spacing near openings is irregular. Our beginner's guide to framing a wall shows how layout is set out from the end of the plate.
The bottom line
Choose 16 vs 24 stud spacing by the load first and preferences second. If a 2x4 wall carries a floor above, it's 16 inches with no exceptions. Non-bearing partitions, roof-only 2x4 walls, and 2x6 walls under one floor can go to 24 inches, saving about a third of the studs and improving insulation. That only works if trusses and joists line up with the studs and you plan drywall and blocking for the wider bays. When in doubt, especially in wind zones, frame at 16 inches. For ceilings and joists, see our guide to ceiling joist spacing.
Related Reading
- 16-Inch On Center Stud Layout: The 15-1/4" Rule
- Deck Joist Spacing: 12, 16, or 24 Inches on Center?
- Best Framing Layout Tools (2026)
About the author
The AltitudeCraft Team designs and supports 12-, 16- and 24-inch stud layout jigs for wall framing. This guide is based on IRC Tables R602.3(5) and R702.3.5 as reproduced in adopted codes and local handouts, the Department of Energy's Building America guidance, attributed builder sources, and return notes from our own customers. Stud counts are calculated, not field-tested. Always confirm requirements with your local building department.
Featured in this guide
AltitudeCraft 16 Inch Precision Framing Stud Layout Tool
From $42.99
Free shipping & free returns on US orders $25+
View productRelated Articles
 Framing Jig: Why Every One Has Play, and When It Beats a Tape (2026)
Aug 16, 2026
 Headspace Gauge vs Headspace Comparator vs Case Gauge: Which One Do You Need? (2026)
Oct 29, 2026
 How to Slide Tandems by Yourself (Without a Spotter)
Oct 28, 2026
 Tandem Slide Calculator: How Many Holes to Slide (Free, 2026)
Oct 28, 2026
