




A suction-cup bread slicer holds best when the feet and the counter are clean and the counter is smooth. The AltitudeCraft AC422 user manual says: "Clean the counter and press the suction base firmly into place." Our suggestion is to wipe the feet too. Textured or dusty spots hold less well.
For the bigger picture, see our complete guide to bread slicers.
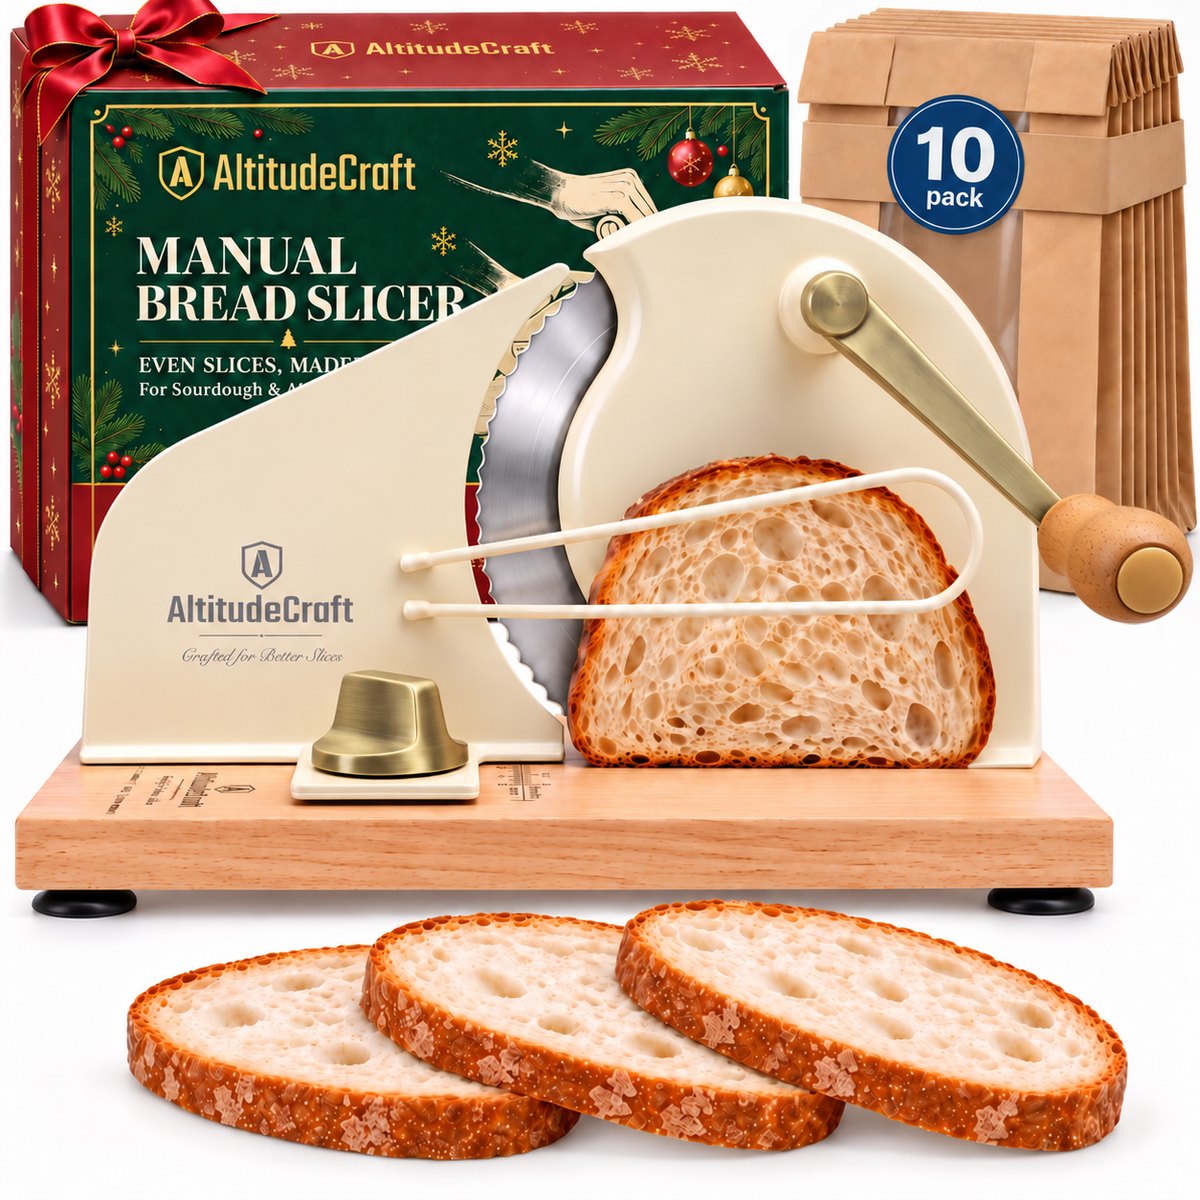
If you are still choosing a slicer, ours is a manual bread slicer with a wood base and suction-cup feet.
Key takeaways
- Clean first, then press. The manual says: "Clean the counter and press the suction base firmly into place." Our suggestion is to wipe the feet as well.
- A smooth, clean counter is the target. General suction-cup advice points to air under the rim, and to dust, crumbs and oil, as reasons a cup lets go.
- Put nothing under the slicer. Our reasoning is that a towel, mat or tablecloth adds a soft or textured layer.
- If the base moves, stop turning, lift the slicer, wipe the spot and the feet, and press the wood base down again. A loose knob or blade is a different problem.
- If a clean, smooth counter and clean feet still slide, or a foot looks torn, cracked or worn, stop using the slicer and email support@altitudecraft.com. The manual says: "Always secure the slicer before use."
Why Does a Bread Slicer Slide on the Counter?
General suction-cup advice names air pockets, dust, crumbs and oil as reasons a cup lets go, so a counter that is not smooth or clean may give air a way in. Our reasoning is that cranking also pulls the base sideways, which can test a hold that felt fine.
Hunker writes that "even the best suction cups won't adhere to some surfaces because it's impossible to get a good bond that's free from air pockets." It adds that "in many cases, suction-cup failure occurs when either the suction cup or the surface it's grabbing isn't as clean as it could be."
A wobble from a loose thickness knob or blade is a different problem. The manual says "Do not use if any part is loose or damaged."

How Do You Set the Suction Base So It Holds?
The manual's first step is: "Clean the counter and press the suction base firmly into place." Our suggested routine adds three moves: wipe the counter and the feet, set the slicer on one flat stretch of counter, then press down on the solid wood base before you load a loaf.
- Wipe the spot and the feet. Clear flour, crumbs and greasy film from the counter patch and each foot. Our bread slicer cleaning guide covers the suction feet.
- Choose a flat, plain stretch. Our suggestion: keep all feet on one continuous surface, away from seams, tile joints and the sink edge.
- Set it down and press the wood base. Press down on the solid wood base and keep your hands clear of the blade.
- Check each corner. Our suggestion: press down over each foot in turn. If a corner lifts or rocks, lift the slicer, wipe that spot and press again.

How Do Common Countertops Differ for Suction Feet?
Generally, the flatter, smoother and cleaner the surface, the more reliably any suction foot holds. Public sources describe porous or textured surfaces as poor for suction, so grout lines, textured finishes and fabric are worth checking. These are public sources' views, not a ranking.
One kitchen-appliance maker's use instructions for its own suction base ask for a smooth countertop and say: "Both silicone suction disc and countertop should be free of dust, crumbs, and oil before each use." For our slicer, the manual says to clean the counter.
General guidance, not an AC422 test. The table does not say how our slicer performs on any surface. The finish matters more than the material name, so feel your own counter.
| Surface | How public sources describe it | Our reasoning for a suction foot |
|---|---|---|
| Glass | Hunker names a window or mirror as a "clean, flat and completely smooth" surface for suction cups | Smooth, but grease counts as dirt. |
| Polished or honed stone | Hunker: "textured finishes" make lasting suction difficult | A polished face is generally smooth; a honed or leathered face that feels textured may hold less well. |
| Tile | No source we found discusses grout and suction | A foot across a grout line has an air path under its rim. General guidance, not an AC422 test. |
| Butcher block or other wood | Jillee: porous or textured surfaces do not hold suction well | Bare or oiled wood may be porous or textured. General guidance, not an AC422 test. |
| Tablecloth or vinyl cover | No source tests one under a suction foot | Fabric is textured by design. General guidance, not an AC422 test. |

What Makes Suction Feet Let Go?
Public suction-cup advice names dust, crumbs, oil and a worn cup as reasons a cup lets go. Our reasoning adds that flour counts as dust and that a seam leaves a gap under part of a rim. Each lets air in, so wiping and moving the slicer are the first things to try.
- Flour, crumbs and oil. The maker's instructions above name "dust, crumbs, and oil." Flour counts as dust.
- A seam under the rim. A foot across a tile joint or counter seam has a gap under part of its rim.
- A torn, cracked or worn foot. If a suction foot looks torn, cracked or worn, stop using the slicer and contact support.
Why Does It Still Slide After You Press It?
Match what you see to a likely cause and try the first fix. Texture, dust or a seam under a foot are the causes to check first, so wipe, move the slicer and press again. If a clean, smooth counter and clean feet still slide, stop using the slicer and contact support.
| What you see | Possible cause | Try first |
|---|---|---|
| Holds when pressed, moves as soon as you crank | A textured or dusty spot under a foot | Stop, wipe, move to a smoother spot and press the base again. |
| Steady for a few slices, then creeps | Flour dust may be reaching the foot rims | Stop, wipe the feet and counter, press again. |
| Will not stay down anywhere on that counter | A textured counter, or a cloth or mat underneath | Try a smooth stretch with nothing under the slicer. If there is none, contact support. |
| Clean, smooth counter and clean feet, still slides | Not explained by the causes above | Stop using the slicer and email support@altitudecraft.com. |
| A foot looks torn, cracked or worn | A damaged foot | Stop using the slicer and contact support. |
| The base is steady but a part wobbles | A loose thickness knob or blade, not the feet | Check the manual: "Do not use if any part is loose or damaged." |
What Should You Not Put Under a Bread Slicer?
Our suggestion is nothing: no towel, non-slip mat or tablecloth. Our reasoning is that a suction foot should touch the counter directly, since a soft or textured layer puts the very thing the sources warn about under the rim. None of the sources we found tests a mat under a suction foot.
A damp towel suits a cutting board when you saw with a knife, as in our guide to slicing sourdough bread evenly.
The maker's page above suggests a smooth tray under its own suction base. We have not checked a tray with our slicer, so we do not suggest one. Likewise, the manual says only to clean the counter, so skip water or oil on the rim.
How Do You Guide the Loaf So the Base Stays Put?
Follow the manual: place the cooled loaf against the guide, turn the crank smoothly, and guide the loaf gently while the blade does the work. Our suggestion: if the base shifts, stop turning, take your hands away and press the base down again before you continue.
The manual says: "Guide the loaf gently and let the blade do the work." Forcing the loaf adds sideways push. Keep your hands clear of the blade at all times.


AltitudeCraft Manual Bread Slicer: a hand-crank slicer for sourdough and artisan loaves, with a stainless steel serrated blade and a solid wood base on suction cup feet. No electricity needed.
See the Manual Bread Slicer: see the current price on the product page.
Frequently Asked Questions About a Sliding Bread Slicer
Will a bread slicer slide on my counter?
The AltitudeCraft slicer has suction-cup feet. The manual says to clean the counter and press the suction base firmly into place, and the feet hold the base steady on a smooth, clean countertop. Textured or dusty surfaces hold less well. If a clean, smooth counter and clean feet still slide, stop using the slicer and contact support.
What if my counter is textured or tiled?
We cannot promise a hold. A foot across a grout line has a gap under part of its rim. Choose a smooth, clean spot, press the base down and look for rocking. If no spot works, suction feet may not suit that counter, and you can contact support.
Can I use a bread slicer on a tablecloth or mat?
We do not suggest it. A cloth or mat adds a soft or textured layer between the feet and the counter. Our reasoning is that this is the very thing to avoid.
Why does my bread slicer hold at first and then shift?
Dust and crumbs can gather as you work, and cranking may pull the base sideways. Stop, wipe the feet and the counter, and press the base down again.
Who do I contact if it still slides on a clean counter?
Stop using the slicer and email support@altitudecraft.com. The manual says: "Always secure the slicer before use."
What if a suction foot looks damaged?
If a foot looks torn, cracked or worn, stop using the slicer and contact support.
The Bottom Line
To keep a bread slicer still, wipe the counter and the feet, press the wood base down on a smooth, clean stretch of counter, and stop and re-seat it if it moves. If a clean counter and clean feet still slide, or a foot looks damaged, stop using the slicer and email support@altitudecraft.com.
Put nothing under it (see above), and treat a loose knob as a reason to stop. Still deciding? See is a hand-crank bread slicer worth it, bread slicer vs bread knife, or the AltitudeCraft Manual Bread Slicer. More guides are on the AltitudeCraft Kitchen blog.
How We Put This Guide Together
Setup and operating steps and the safety lines come from the AltitudeCraft AC422 user manual, and product details from our product records. Quotes come from the sources below. This is a usage and principles guide, not a test report. The countertop table, the advice about what not to put under the slicer and the points labeled as suggestions or reasoning are general principles, not test results for our slicer, and this guide does not report how it holds on any particular counter. Images marked Illustration are AI-generated illustrations; the foot close-up is a cropped photo of the slicer.
Sources
- AltitudeCraft AC422 user manual: operating instructions and safety warnings.
- One kitchen-appliance maker: Master System Base, use instructions (one maker's instructions for its own product, accessed 2026-10-12)
- Hunker: How To Make Suction Cups Stick Better (accessed 2026-10-12)
- One Good Thing by Jillee: How To Make A Suction Cup Stick (accessed 2026-10-12)
- Bob Vila: The Best Countertop Materials for Every Type of Kitchen (accessed 2026-10-12)